Last time, we prepared our DirectX code for drawing in 3D. This time, we’re going to work through our shaders. There’s a lot of images in this one. Sorry about that if it takes a while to load. All of the 3D shots were taken from an angle and distance so that they appear to be the same size, but they actually are different sizes. I’ll add a caption to each. Now on with the show.
Our old vertex shader just took a vertex id and generated one of 3 vertices to form a triangle that completely covered the screen. Let’s pretend for a second that we haven’t created the vertex and index buffers just yet. So all we’ve done is passed a view/projection matrix into the shader. We need to add the constant buffer to the shader. Then we need to multiply our original vertex position by our view/projection matrix.
struct VS_OUTPUT {
	float4 pos : SV_POSITION;
	float2 tex : TEXCOORD;
};

cbuffer ConstantBuffer : register(b0)
{
    float4x4 viewproj;
    int height;
    int width;
}

VS_OUTPUT main(uint input : SV_VERTEXID) {
	VS_OUTPUT output;

	output.pos = float4(float2((input << 1) & 2, input == 0) * float2(2.0f, -4.0f) + float2(-1.0f, 1.0f), 0.0f, 1.0f);
	output.tex = float2((output.pos.x + 1) / 2, (output.pos.y + 1) / 2);
    output.pos = mul(output.pos, viewproj);
	return output;
}
The output will look something like this: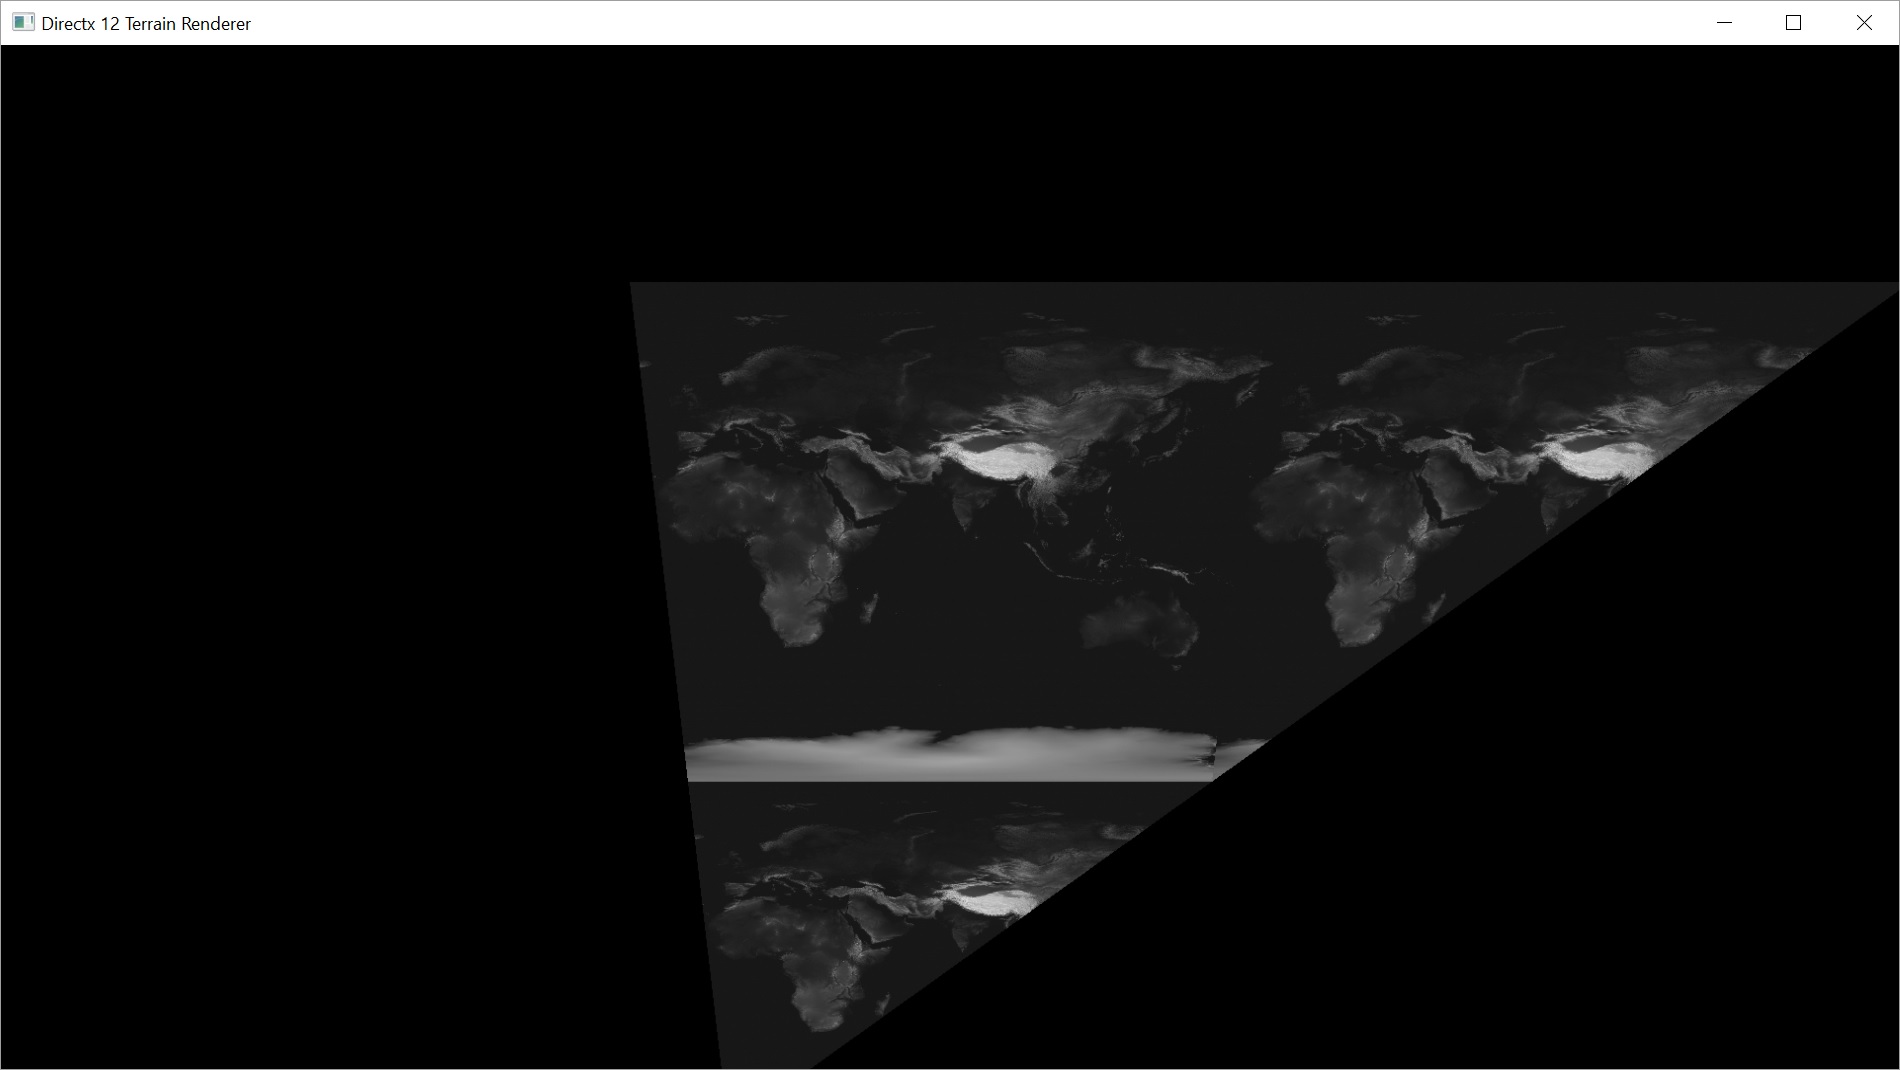
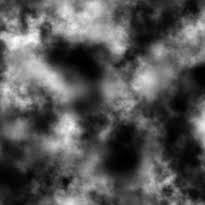
Now let’s add the height map texture to the vertex shader and change the code so we’re actually getting the vertices we made. Since our height map is a black and white image, we don’t care which channel we pick from RGB. They all have the same value.
We’ll set our texture coordinates such that we’ll be stretching the height map texture across the entire grid.
struct VS_OUTPUT
{
	float4 pos : SV_POSITION;
    float2 tex : TEXCOORD;
};

cbuffer ConstantBuffer : register(b0)
{
    float4x4 viewproj;
    int height;
    int width;
}

Texture2D<float4> heightmap : register(t0);

VS_OUTPUT main(float3 input : POSITION)
{
	VS_OUTPUT output;

    float4 mysample = heightmap.Load(int3(input));
	output.pos = float4(input.x, input.y, mysample.r, 1.0f);
	output.tex = float4(input.x / height, input.y / width);
    output.pos = mul(output.pos, viewproj);

 	return output;
}

4096×4096
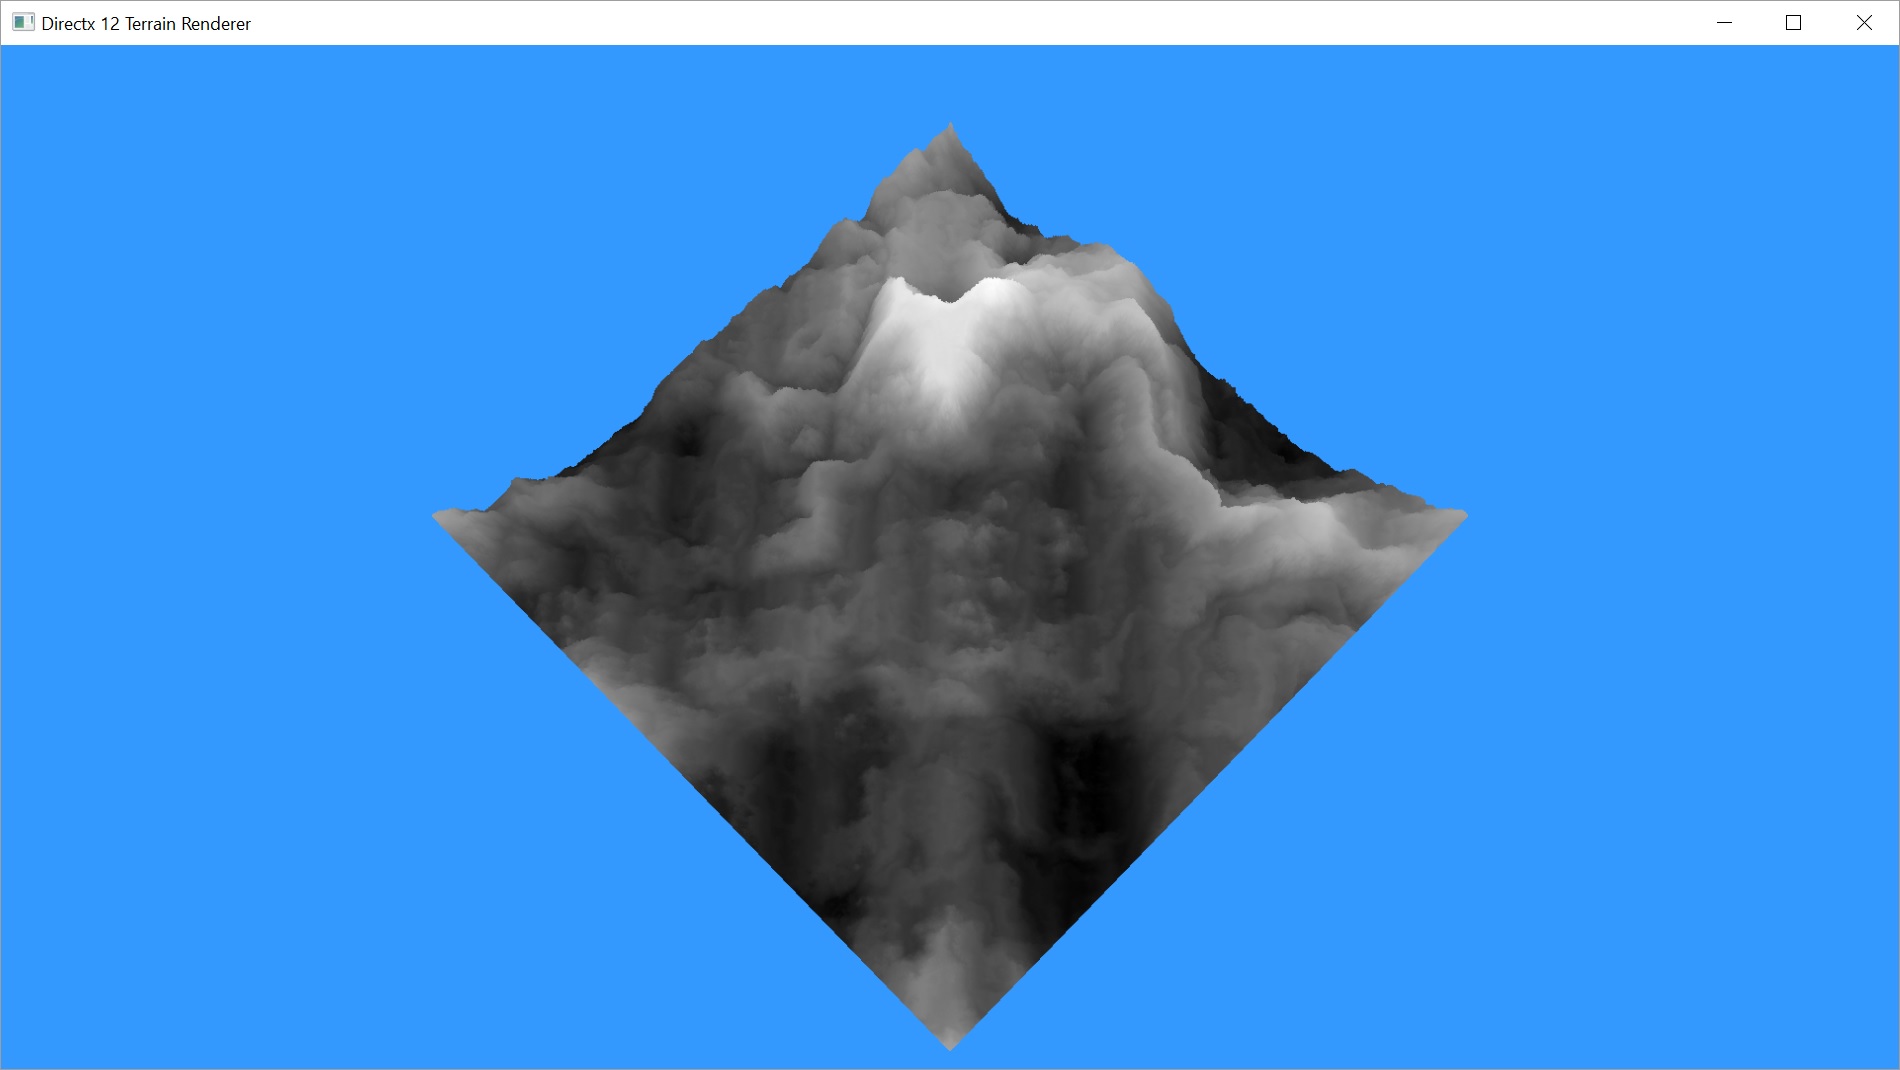
Huh. That’s still flat. Well, of course it is! When we passed our height map data into the shader, we used the DXGI_FORMAT_R8G8B8A8_UNORM format for the texture. That converted our values from the original 0-255 values to 0.0-1.0 floating point values. I don’t mind that, actually. Now I can set whatever scale I want. I just need to multiply mysample by the scale factor. Let’s start with 255, since that should get us back to the original values.
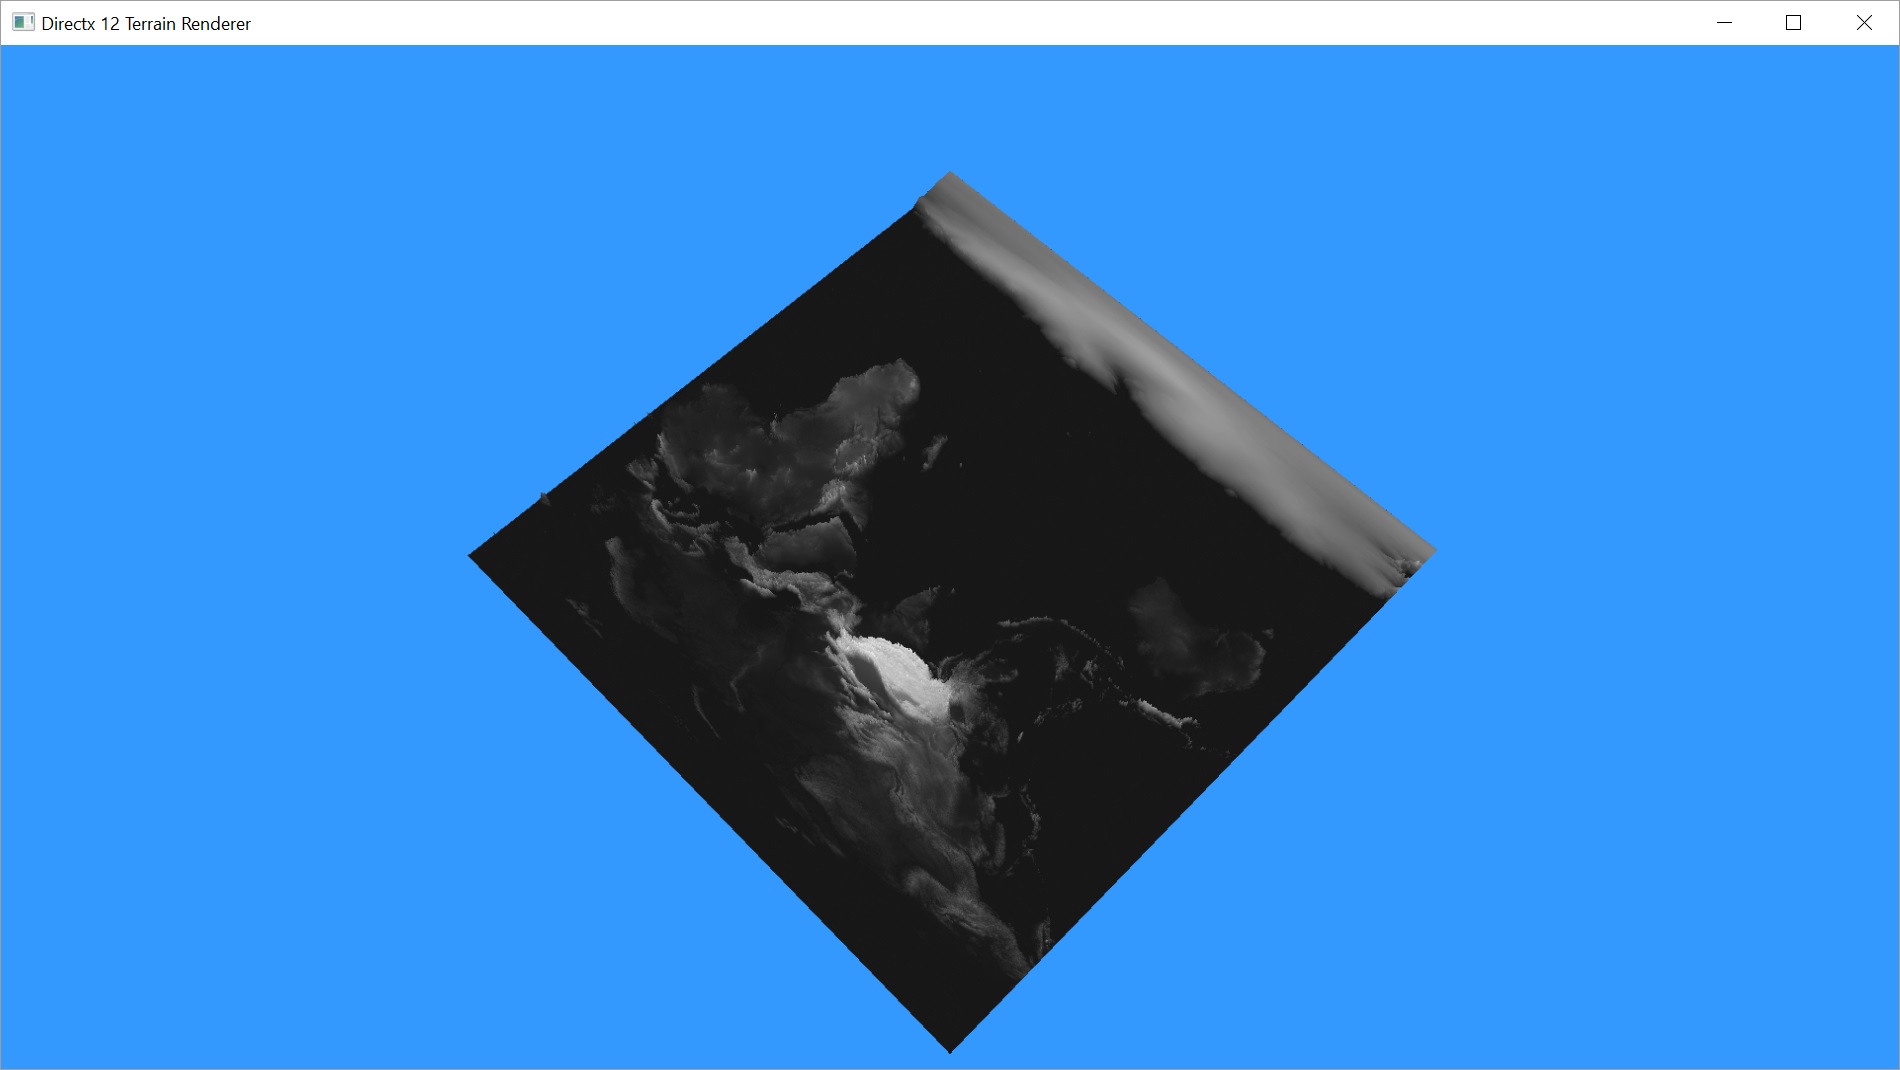
Wow. That’s still really flat. But I’m pretty far away in order to get the whole thing in the frame. Let’s move closer.
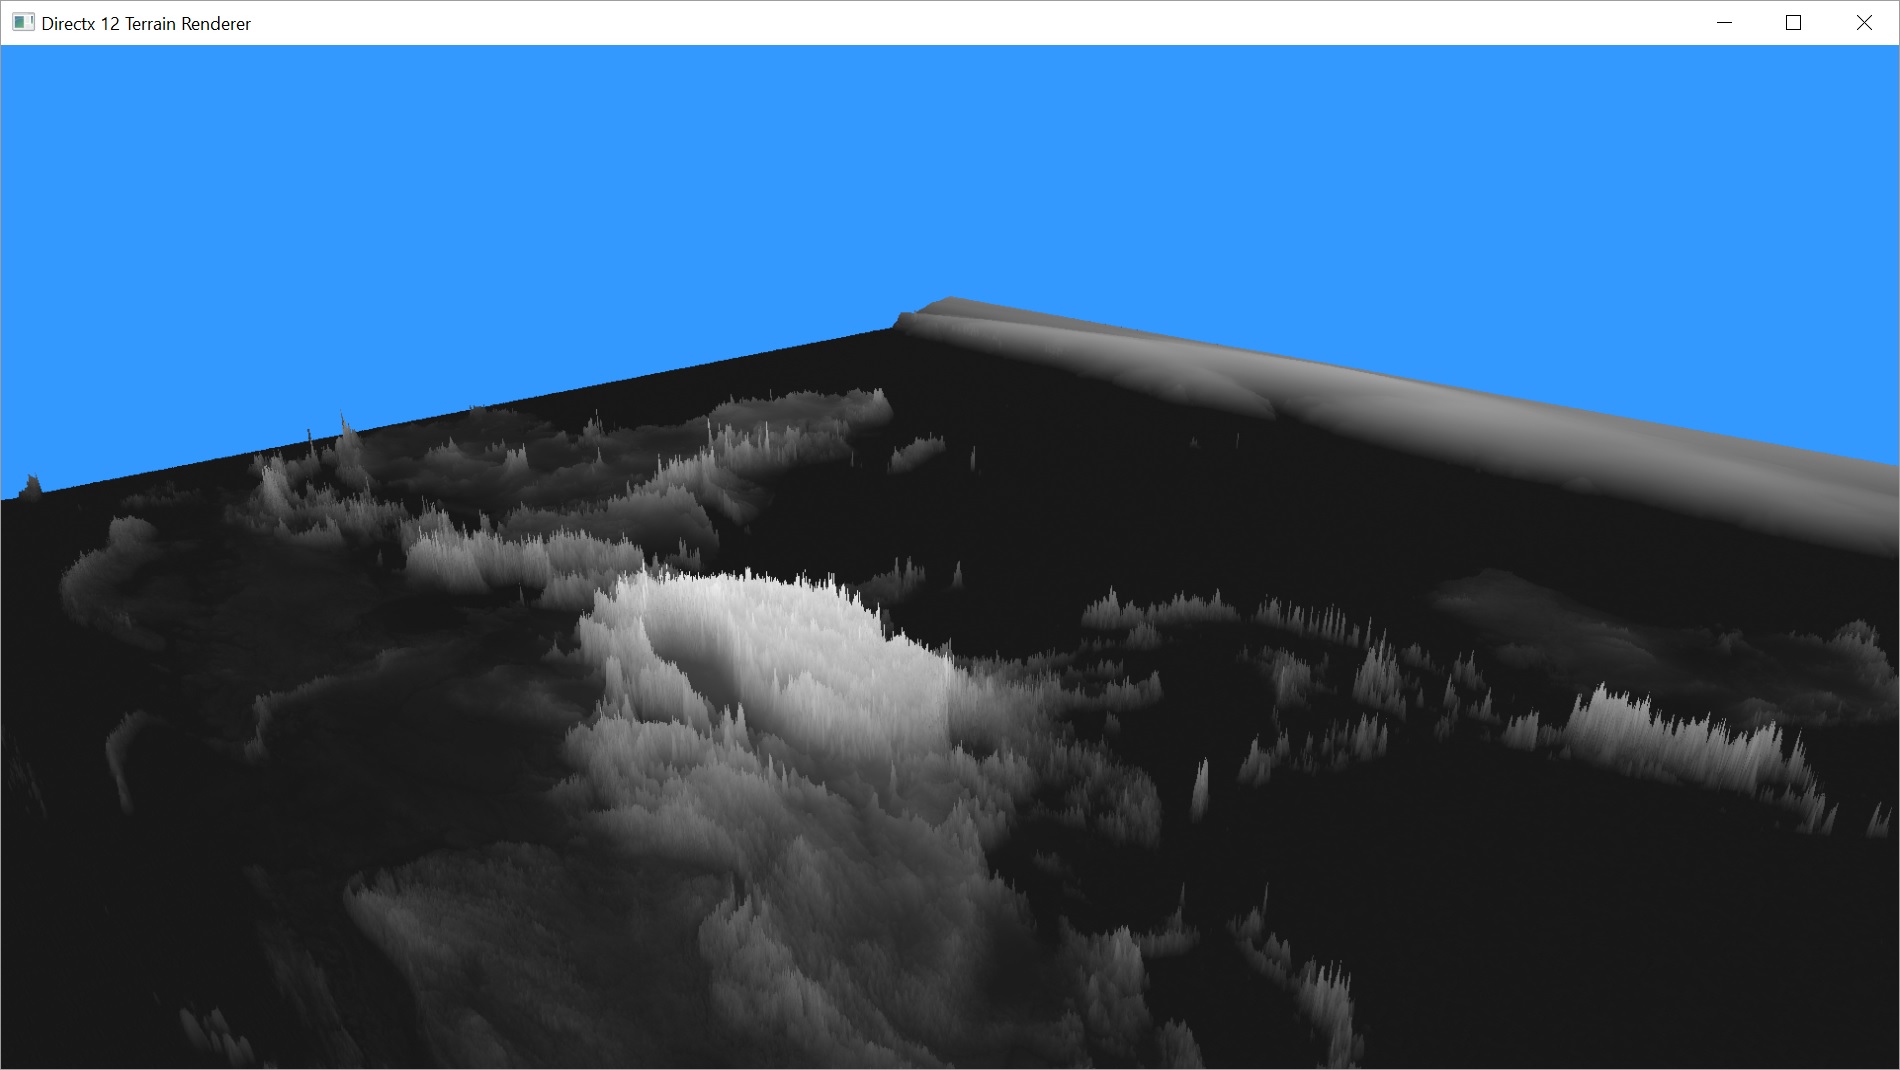
That doesn’t look very good. The low lands are really flat and the mountains are really spiky. I think the problem here is that we don’t have enough granularity with a range of 0-255 to represent the real elevations of the Earth. I looked at a list of countries by elevation, and most are below 1000m, whereas Mount Everest is close to 9000m. So this was a bad choice in height maps. Why don’t we try our other one?
2048×2048
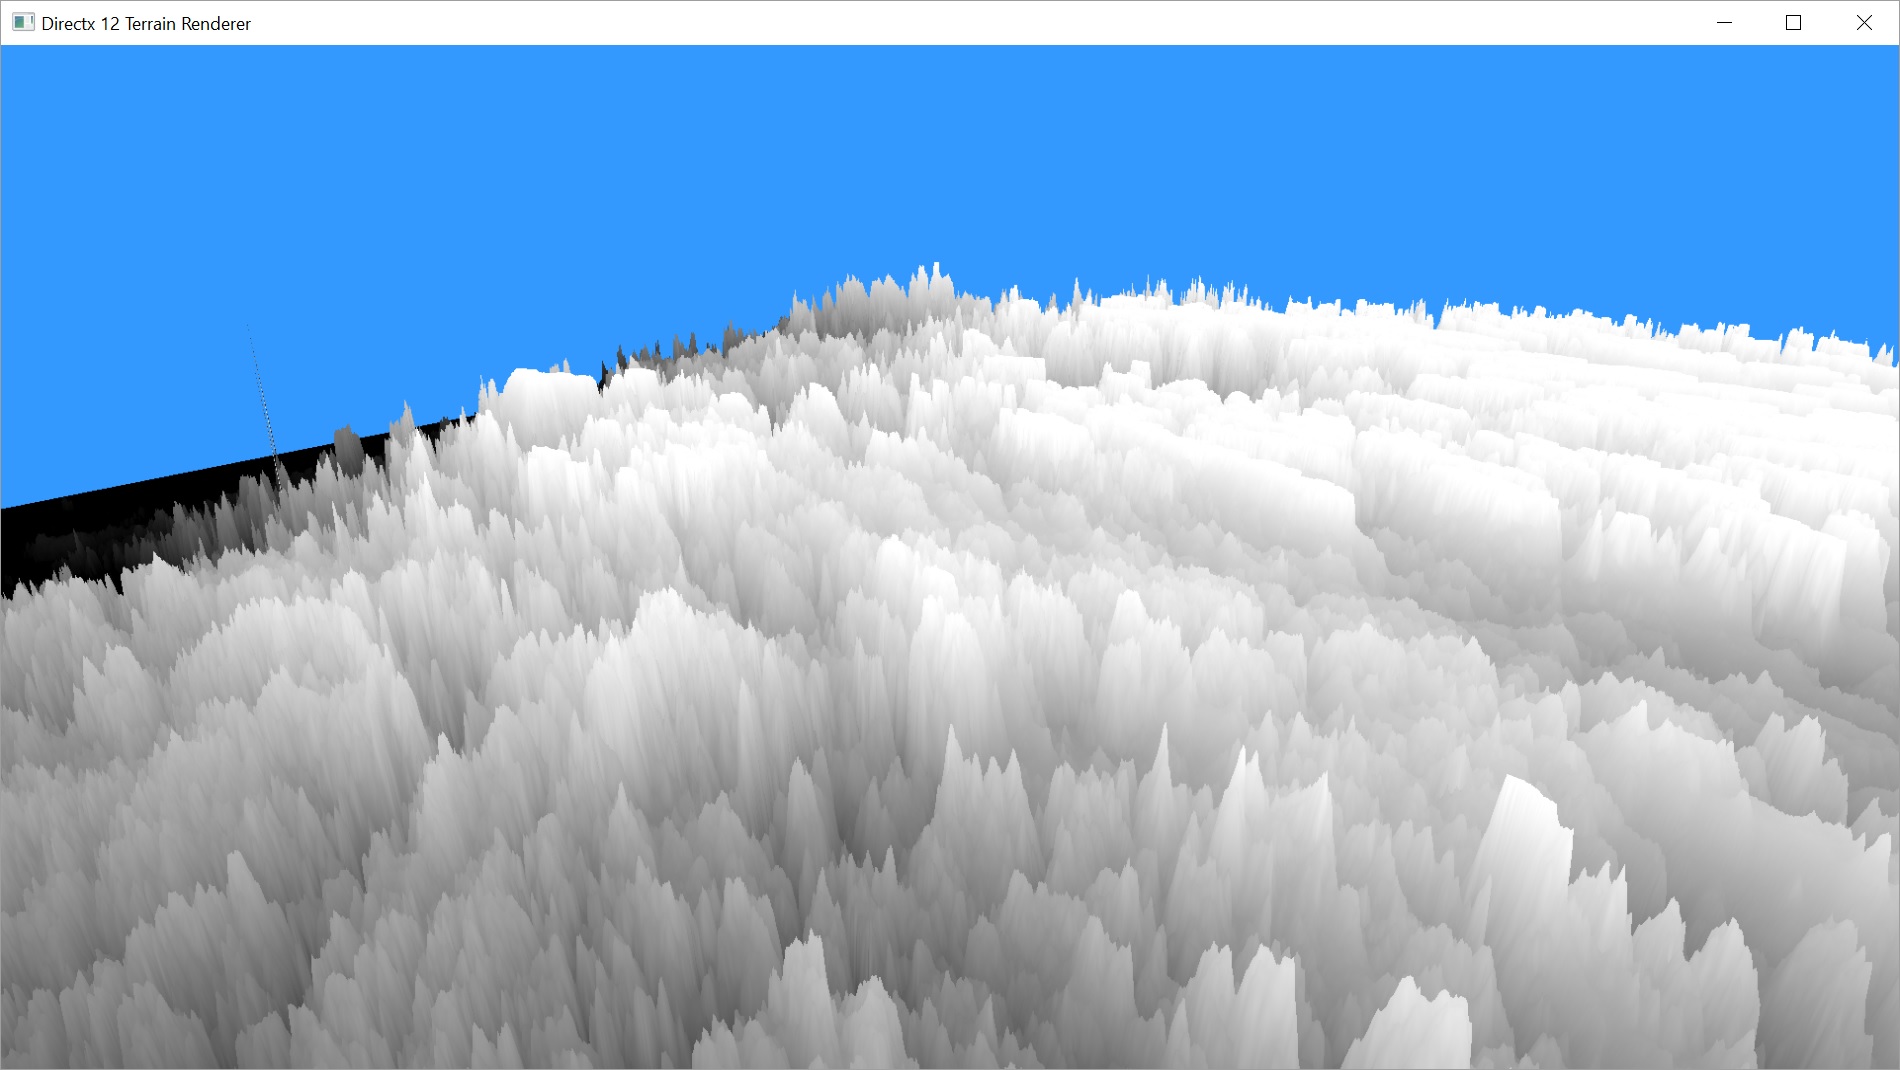
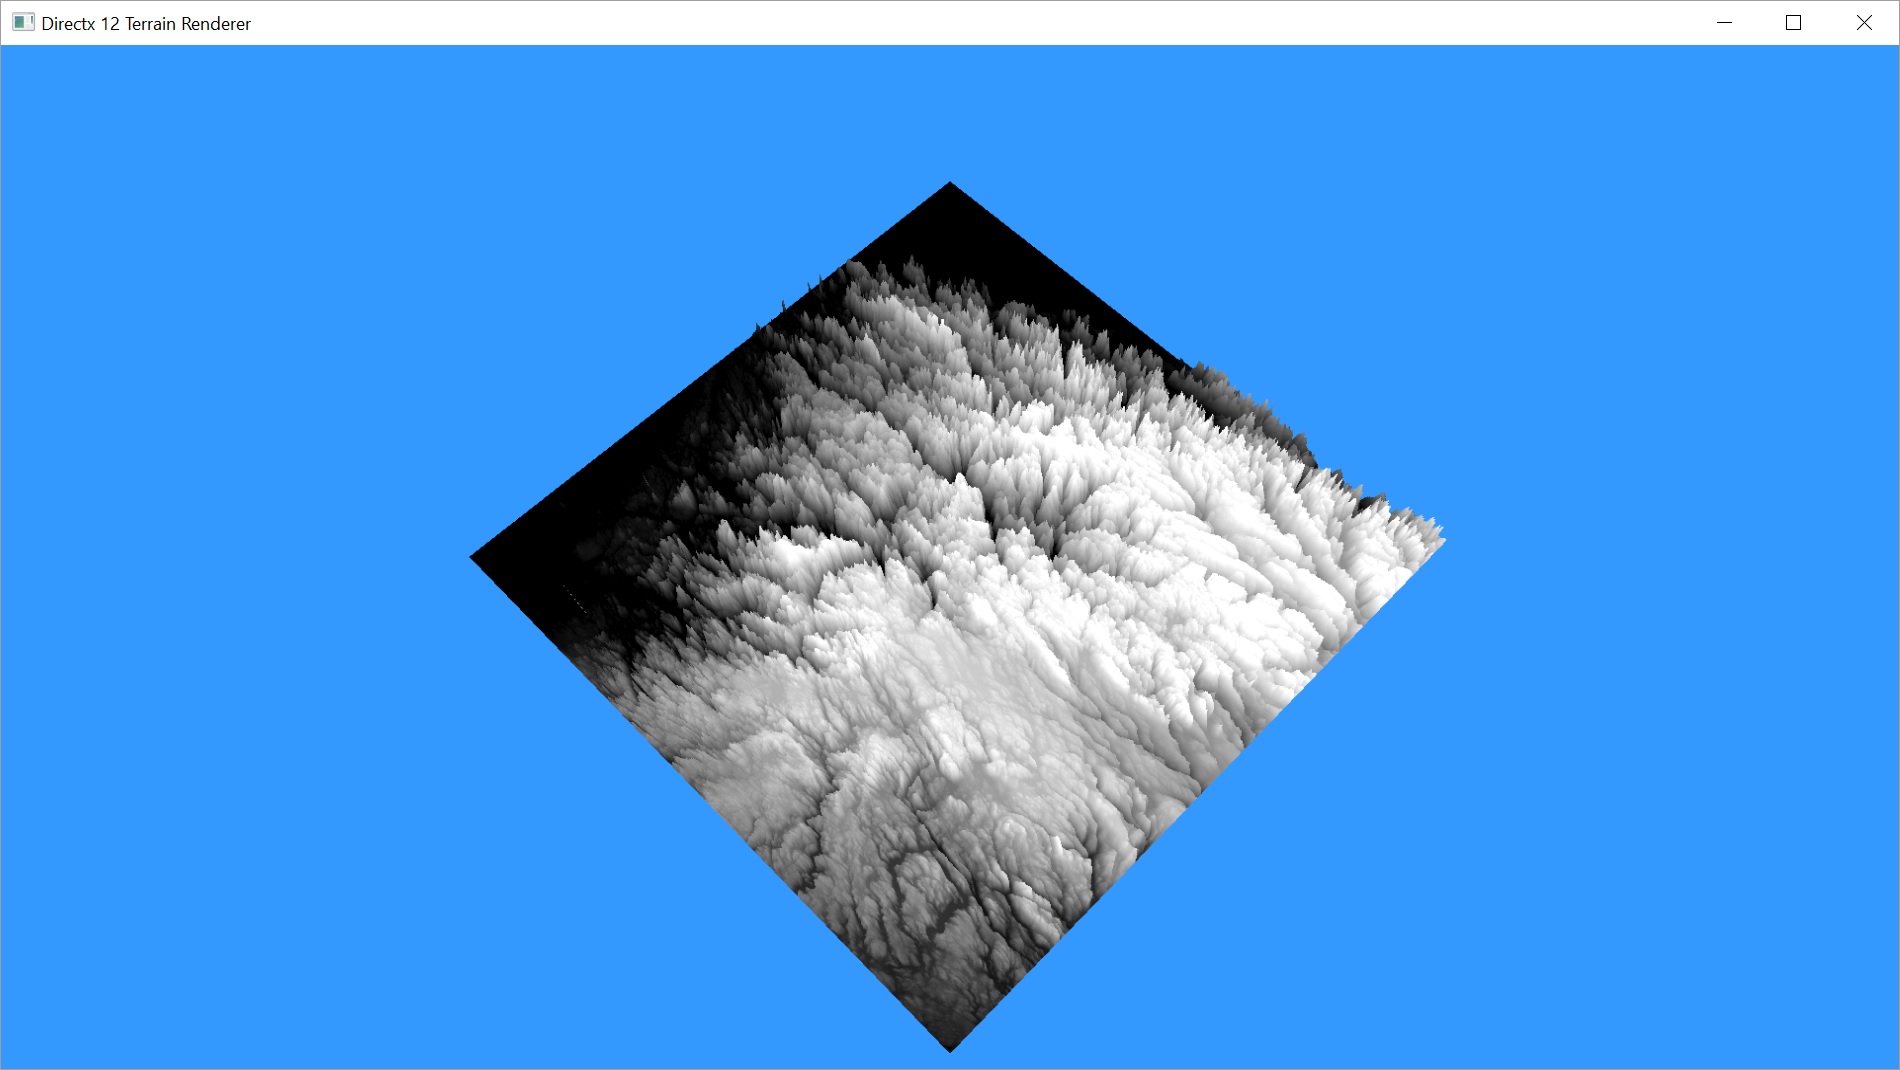
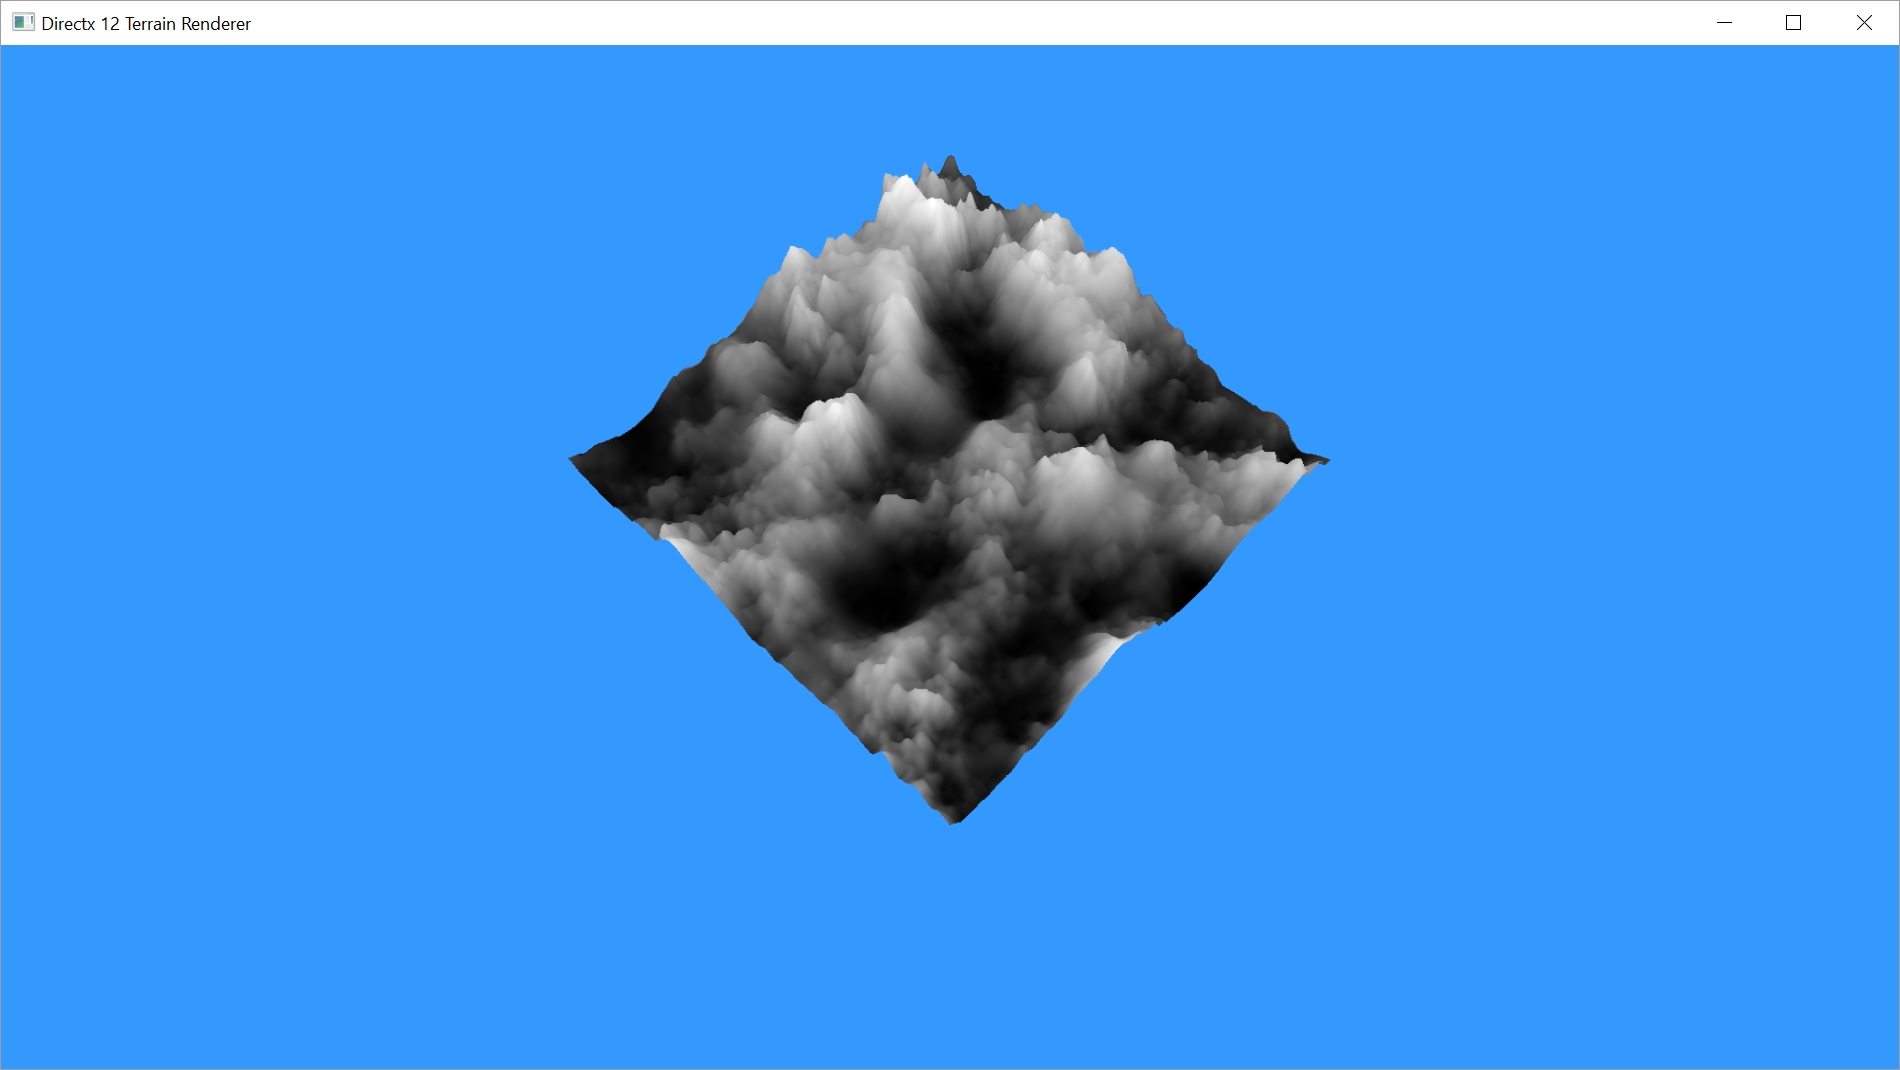
Yuck. That’s super spiky. Let’s try toning it down by using a different scale factor. I tried a few different values and eventually settled on 32.

So that looks better, but it’s pretty flat. Maybe this isn’t the best choice in height maps either.
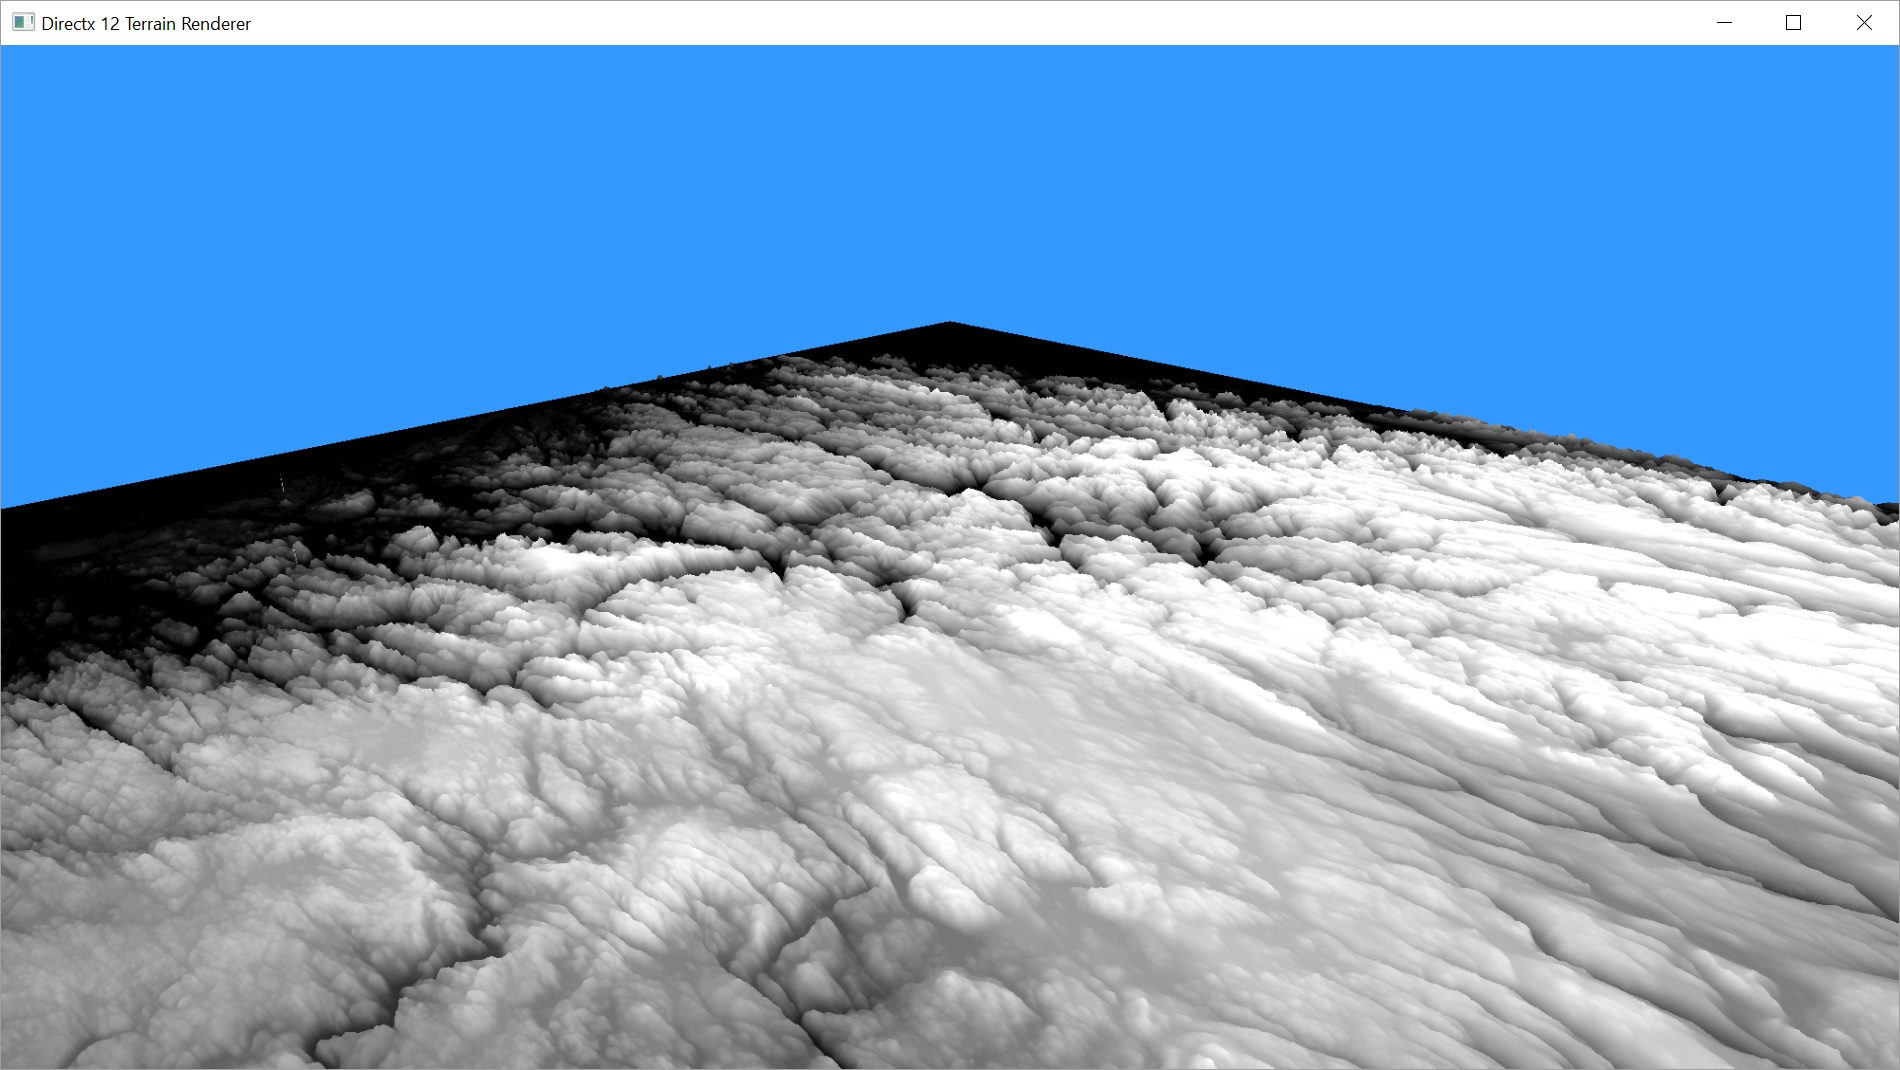
Let’s look for some new height maps. These all look pretty good with a scale factor of the width of the height map divided by 4.
1024×1024
2048×2048

512×512
205×205


Sorry about all the pictures. Hopefully you’re still with me. Because now we’re going to add some shading. We want our pixel shader to be able to colour the terrain, taking into account which parts are in shadow and which aren’t. The first bit we’ll need for this will be a normal. We’ll be defining vertex normals, but technically a normal is relative to the face of the triangle, not the vertex. A strict definition would be something like a vector which is perpendicular to the surface at a given point. Since our surface is made up of triangles and triangles are flat, every point on the surface of a triangle has the same normal. Since we’re looking at the vertices of the triangle, those vertices share multiple triangles and therefore would have a different normal depending on which triangle we’re talking about. So we take the average of all of the faces.
But how do we calculate a face normal? Each triangle is made up of 3 vertices A, B, and C. If we create 2 vectors B-A and C-A, we now have 2 vectors that represent the plane of the triangle. To find a vector perpendicular to the plane, we just need to take the cross product of these 2 vectors (B-A)x(C-A). Watch out for the order you do it in. One order will give you a normal pointing up and the other will give you one pointing down.

So to get our vertex normal, we just get the face normals of the surrounding triangles and average them. We’re going to cheat a bit here. We’re going to pretend that this vertex is made up of 4 triangles created by joining this vertex and the 4 surrounding vertices along the x and y axis.
Now there’s a bit of a trick to this that comes up because we know that the x and y axes are fixed. A cross product is a fair bit of math, so doing 4 of them for every vertex isn’t really great. But, because the 2 axes are fixed, the math simplifies down. I’ll apologize in advance for the math, but I didn’t find any links that actually walk through it.
BA = B – A
CA = C – A
DA = D – A
EA = E – A
BAX = 0
CAX = 1
DAX = 0
EAX = -1
BAY = -1
CAY = 0
DAY = 1
EAY = 0
BAZ = BZ – AZ
CAZ = CZ – AZ
DAZ = DZ – AZ
EAZ = EZ – AZ
N1 = BA x CA
N2 = CA x DA
N3 = DA x EA
N4 = EA x BA
N = N1 + N2 + N3 + N4
N1X = BAY * CAZ – BAZ*CAY = -1 * (CZ – AZ) – 0 = AZ – CZ
N2X = CAY * DAZ – CAZ*DAY = 0 – (CZ – AZ) = AZ – CZ
N3X = DAY * EAZ – DAZ*EAY = EZ – AZ – 0 = EZ – AZ
N4X = EAY * BAZ – EAZ*BAY = 0 – (-1 * (EZ – AZ) = EZ – AZ
NX = AZ – CZ + AZ – CZ + EZ – AZ + EZ – AZ = 2EZ + 2AZ – 2AZ – 2CZ = 2EZ – 2CZ = 2(EZ – CZ)
N1Y = BAZ * CAX – BAX*CAZ = BZ – AZ – 0 = BZ – AZ
N2Y = CAZ * DAX – CAX*DAZ = 0 – (DZ – AZ) = AZ – DZ
N3Y = DAZ * EAX – DAX*EAZ = -1 * (DZ – AZ) – 0 = AZ – DZ
N4Y = EAZ * BAX – EAX*BAZ = 0 – (-1 * (BZ – AZ)) = BZ – AZ
NY = BZ – AZ + AZ – DZ + AZ – DZ + BZ – AZ = 2BZ + 2AZ – 2AZ – 2DZ – 2BZ – 2DZ = 2(BZ – DZ)
N1Z = BAX * CAY – BAY*CAX = 0 * 0 – (-1) * 1 = 1
N2Z = CAX * DAY – CAY*DAX = 1 * 1 – 0 * 0 = 1
N3Z = DAX * EAY – DAY*EAX = 0 * 0 – 1 * (-1) = 1
N4Z = EAX * BAY – EAY*BAX = (-1) * (-1) – 0 * 0 = 1
NZ = 1 + 1 + 1 + 1 = 4
N = (2(EZ – CZ), 2(BZ – DZ), 4)
N = (EZ – CZ, BZ – DZ, 2)
And there you have the final calculation that we have to implement. A mere 2 subtractions to get our vertex normal. It doesn’t really matter if we normalize this normal in the vertex shader or the pixel shader. We’ll do it here.
struct VS_OUTPUT
{
	float4 pos : SV_POSITION;
	float4 norm : NORMAL;
    float2 tex : TEXCOORD;
};

cbuffer ConstantBuffer : register(b0)
{
    float4x4 viewproj;
    int height;
    int width;
}

Texture2D<float4> heightmap : register(t0);

VS_OUTPUT main(float3 input : POSITION)
{
	VS_OUTPUT output;

	float scale = height / 4;
    float4 mysample = heightmap.Load(int3(input));
	output.pos = float4(input.x, input.y, mysample.r * scale, 1.0f);
	output.tex = float4(input.x / height, input.y / width);
    output.pos = mul(output.pos, viewproj);

    // calculate vertex normal from heightmap
    float zb = heightmap.Load(int3(input.xy + int2(0, -1), 0)).r * scale;
    float zc = heightmap.Load(int3(input.xy + int2(1, 0), 0)).r * scale;
    float zd = heightmap.Load(int3(input.xy + int2(0, 1), 0)).r * scale;
    float ze = heightmap.Load(int3(input.xy + int2(-1, 0), 0)).r * scale;

    output.norm = float4(normalize(float3(ze - zc, zb - zd, 2.0f)), 1.0f);

 	return output;
}
That’s as far as I’ve gotten with the vertex shader. Let’s modify our pixel shader to use the new information we’re sending it, and also change it to render a solid colour while we’re at it.
To do so, we need to define a light. For now, we’re just going to define a directional light directly in the pixel shader. Later, we’ll make it a part of the constant buffer so we can change it and have a day/night cycle.
We take the Dot Product of the vector from the bit we’re looking at to the light source and the normal at this point. If the two are perpendicular, we’ll get a zero. If they are pointing in generally opposite directions, we’ll get a negative. If they’re pointing in similar directions, we’ll get a value between zero and one. We only want values between zero and one, so we use the saturate() function to clamp the value.
We’re using a diffuse lighting model here. Meaning that we don’t currently have specular highlights. We have an ambient component as well, so that unshaded areas will still not be completely black.
Texture2D<float4> heightmap : register(t0);
SamplerState hmsampler : register(s0);

struct VS_OUTPUT
{
	float4 pos : SV_POSITION;
    float4 norm : NORMAL;
    float2 tex : TEXCOORD;
};

float4 main(VS_OUTPUT input) : SV_TARGET
{
    float4 light = normalize(float4(1.0f, 1.0f, -1.0f, 1.0f));
    float diffuse = saturate(dot(input.norm, -light));
    float ambient = 0.1f;
    float3 color = float3(0.32f, 0.82f, 0.41f);

    return float4(saturate((color * diffuse) + (color * ambient)), 1.0f);
}
Let’s see how this looks on our 4 new height maps.
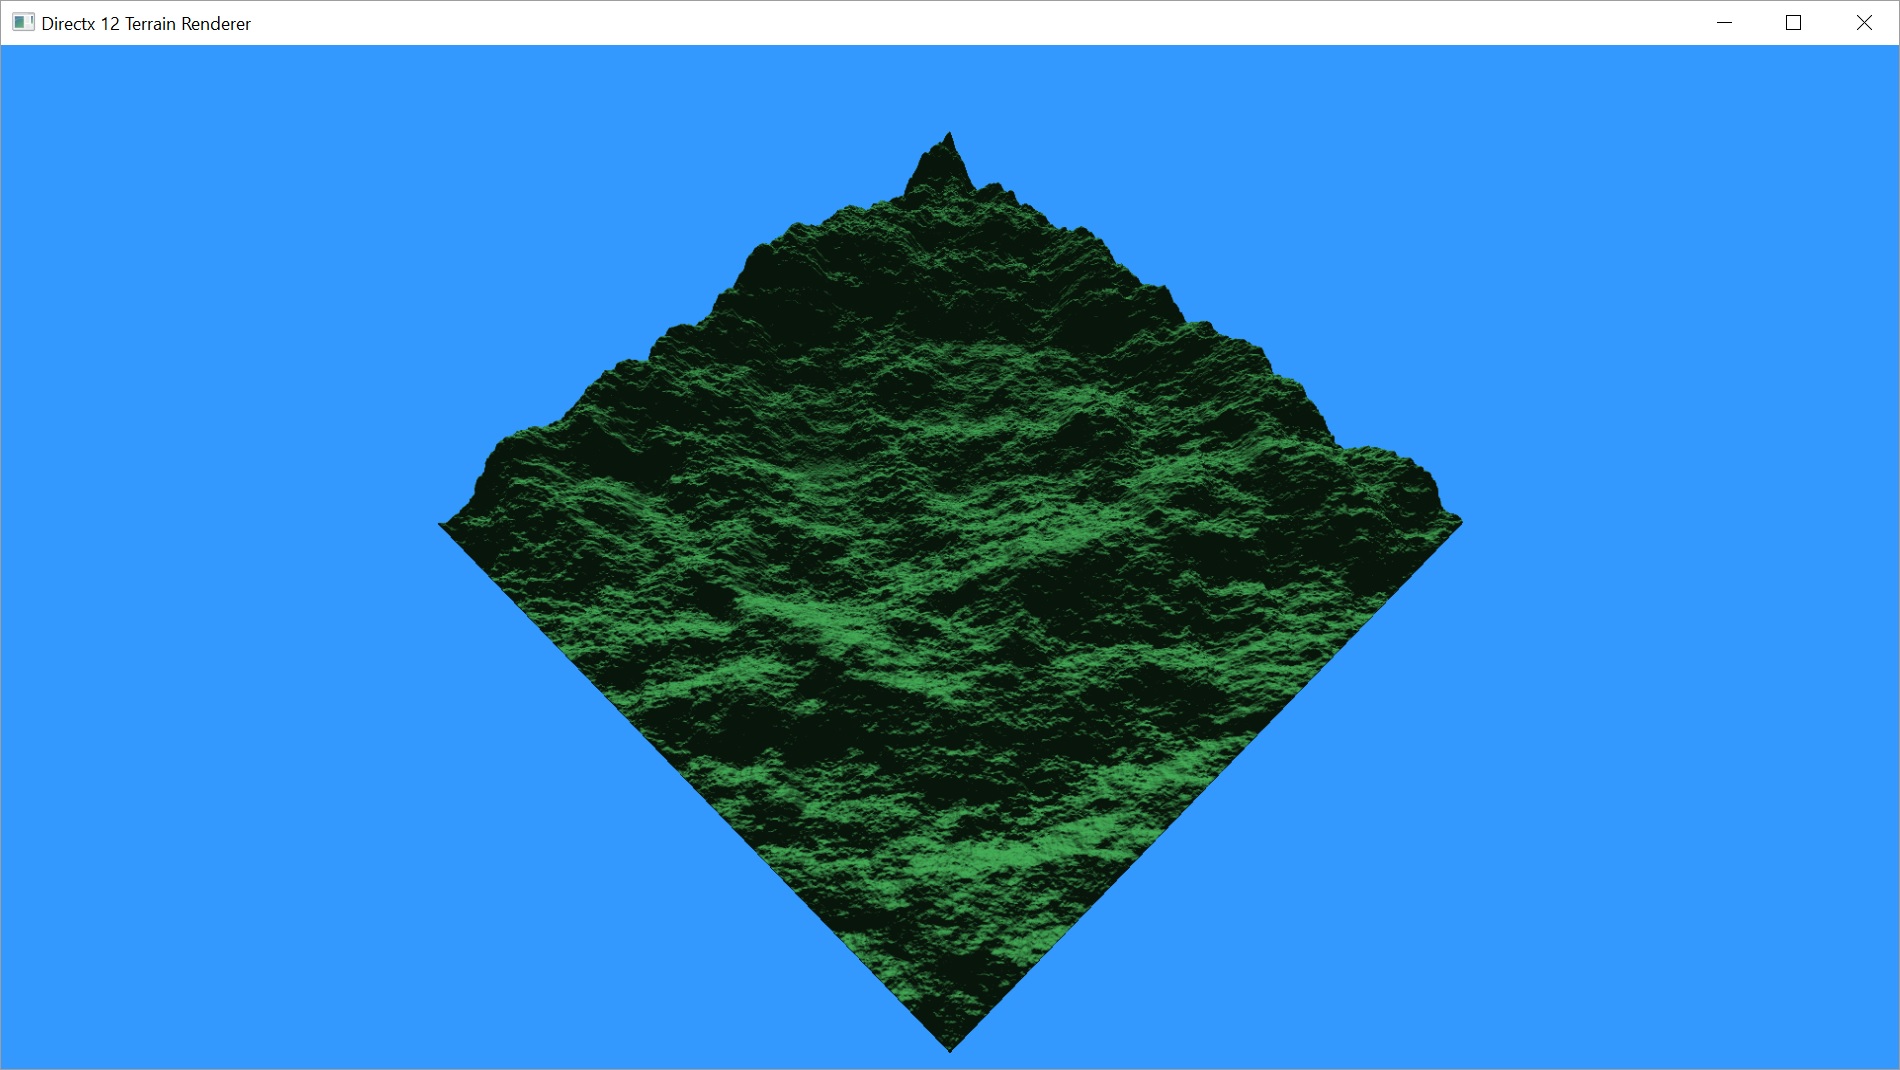
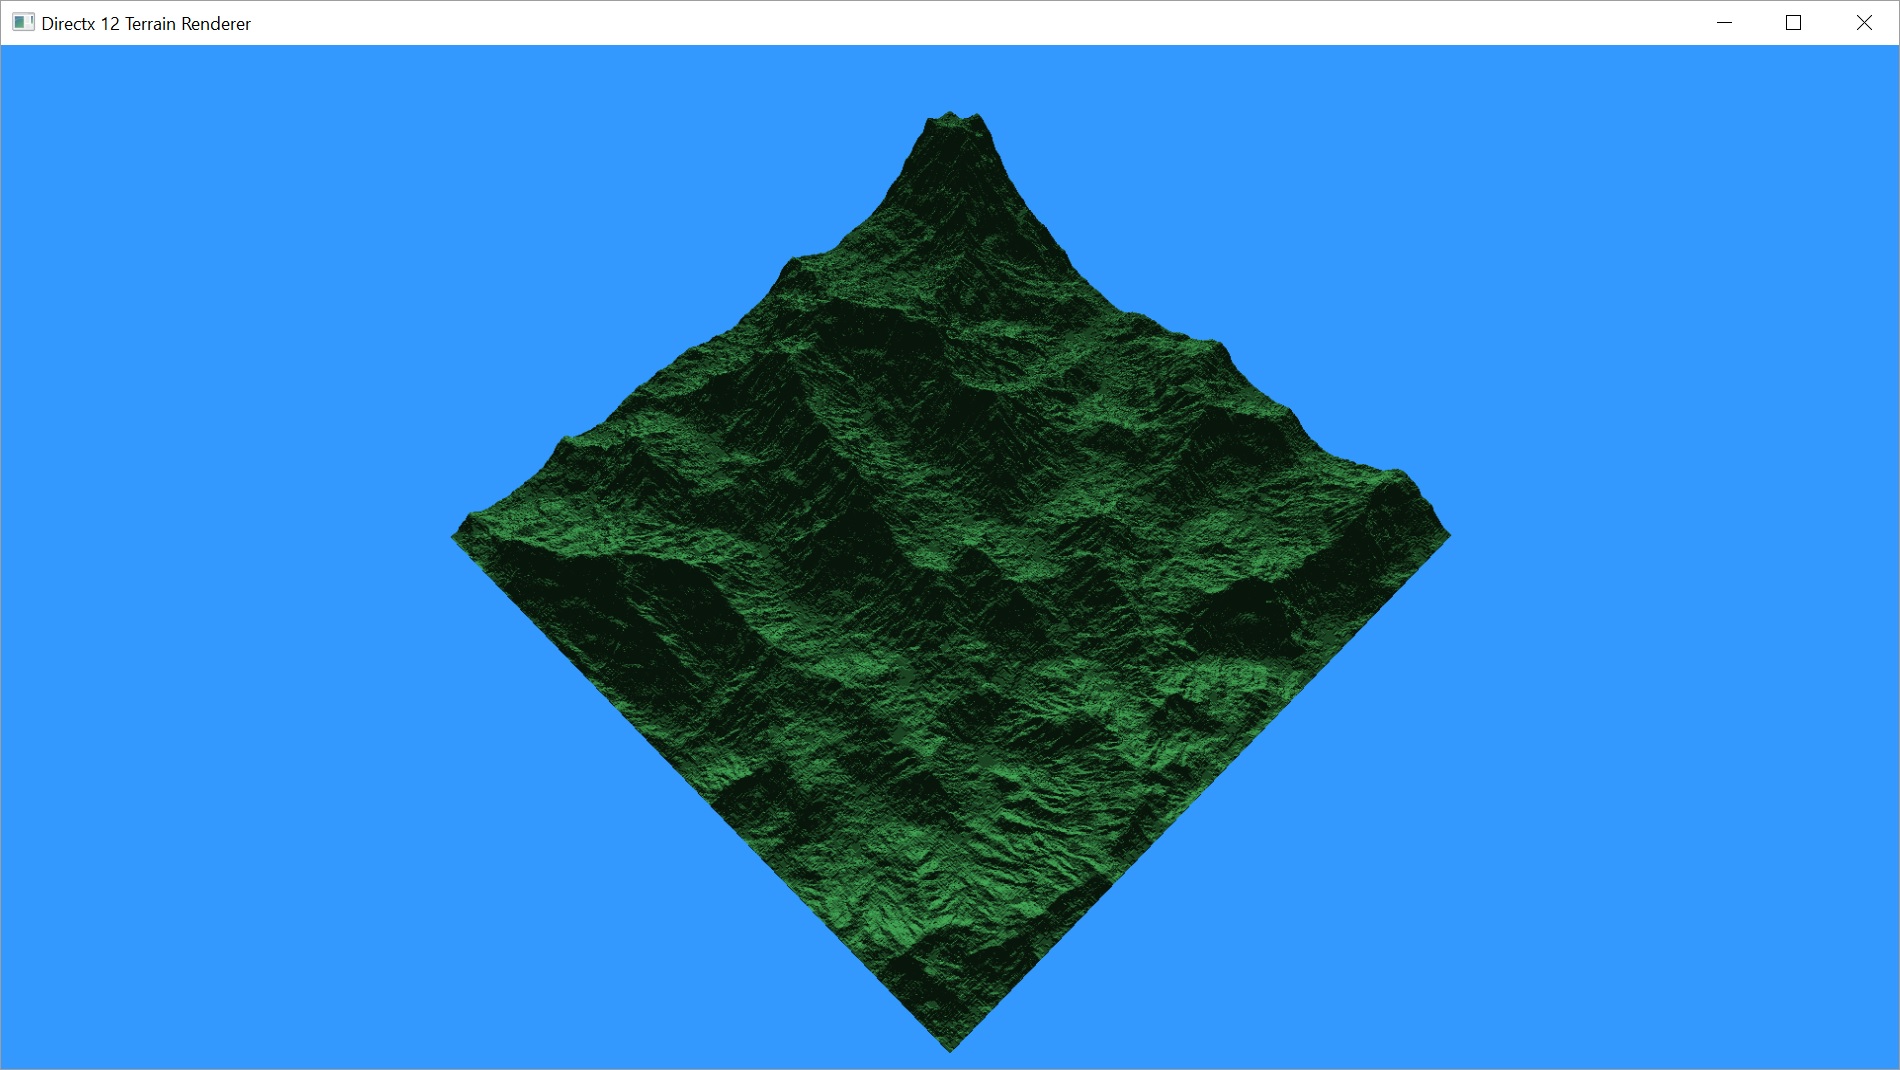
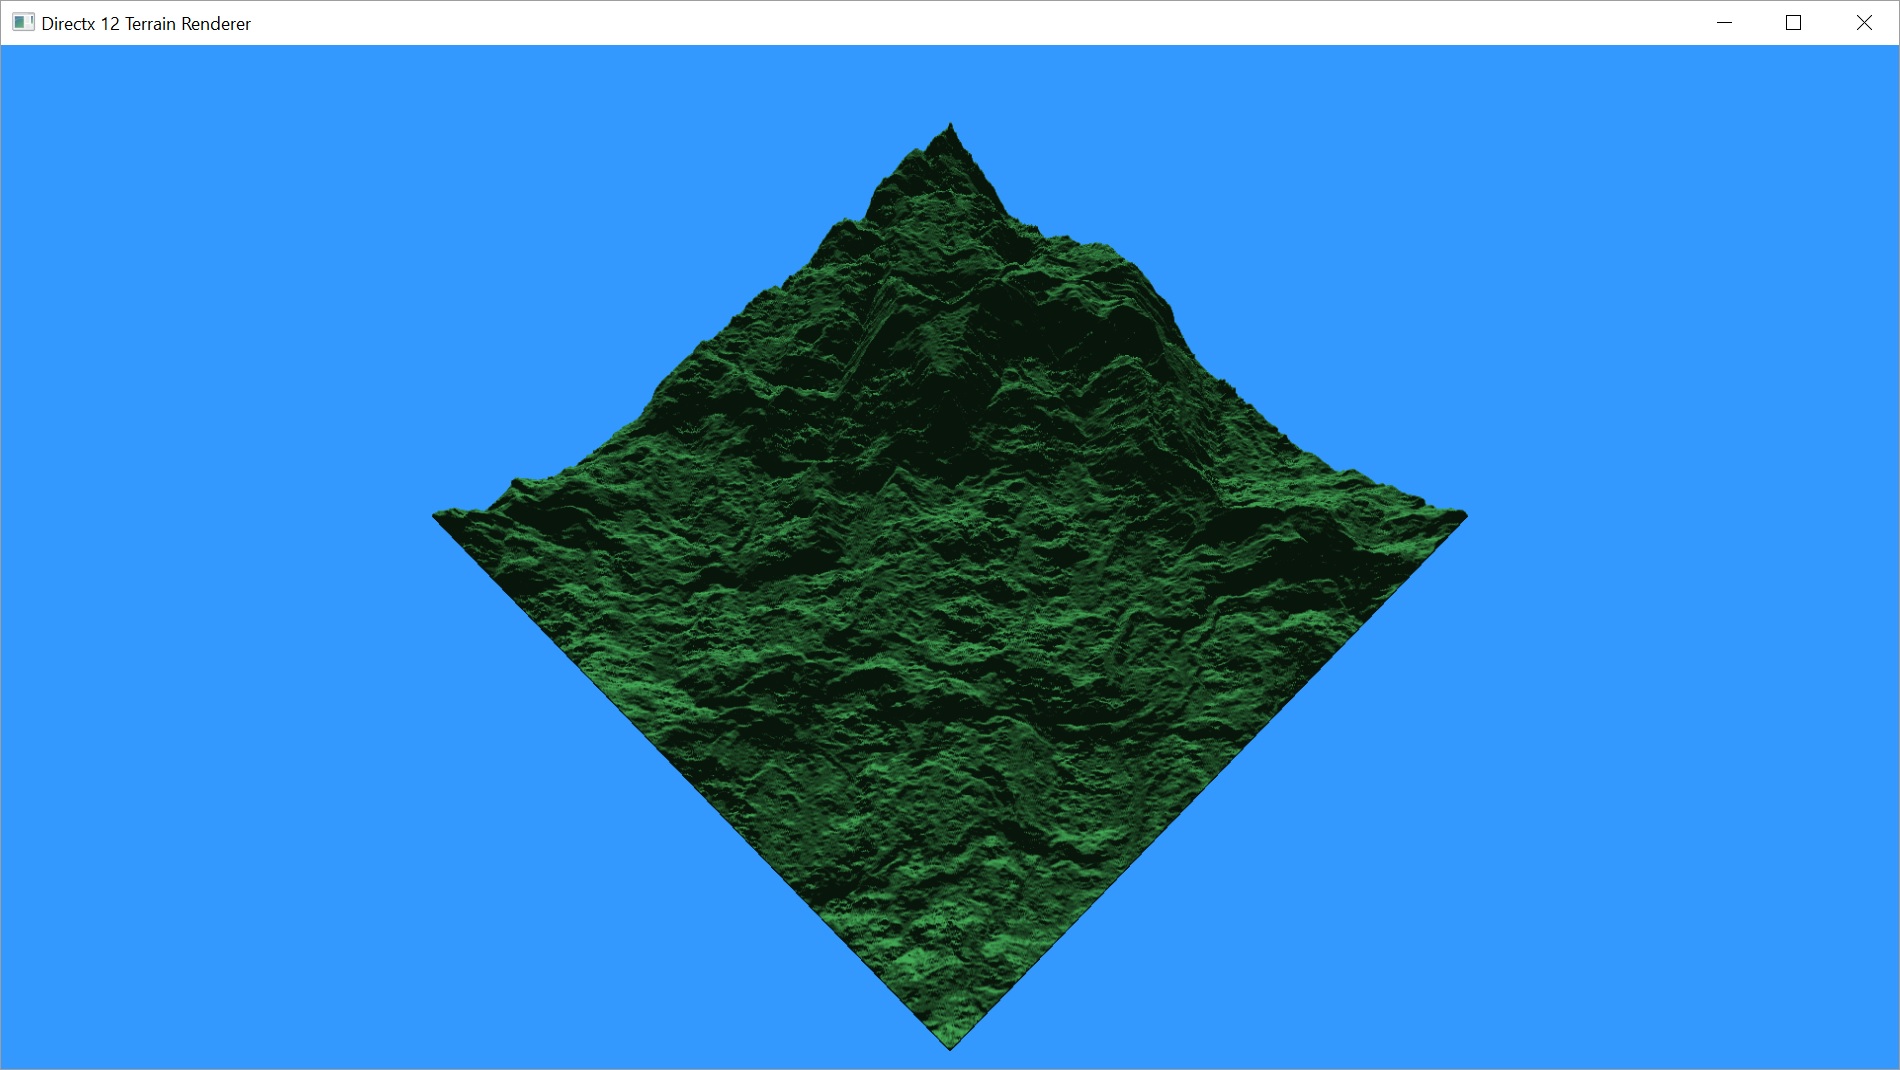

So far, I’m pretty happy with that. This is just shading, so we still need to cast actual shadows. We also need a full colour palette instead of one solid colour. And we’ll need to come up with a way to actually apply that colour palette.
That will not be the next post, though. I’m going to add camera controls in the next post. Given the most recent 2 topics took 2 posts each of around 2000 words, I’m going to try and have a bit less next time. If it feels short, I’ve got a couple of other things I can talk about related to the project.
For the latest version of the project, go to GitHub. Please be aware that the posts are going up on a delay as I am only posting twice a week. I’m coding pretty much every day, so the posts are behind the code. I may have updated the code since I wrote this post.
Traagen